 |
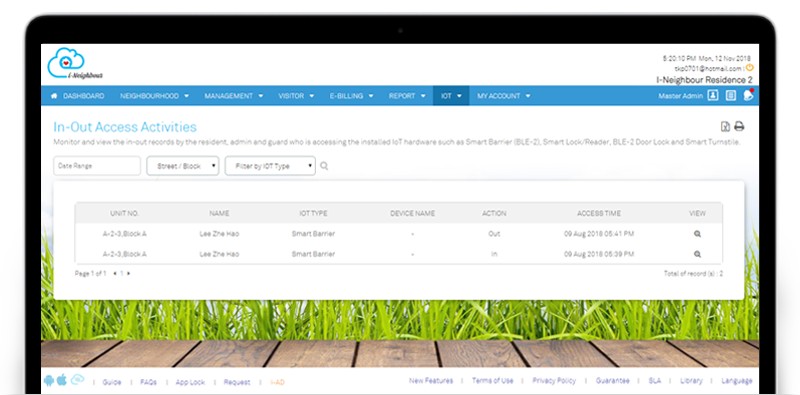
| Smart Devices (IoT): In-Out Access Activities |
| For neighbourhoods installed with Smart Devices, Administrator can now view the In-Out access activities through Web Portal. This is to assist the Administrators in monitoring and retrieving the resident’s In-Out access data, if necessary. The listing table will display the fields such as: Unit No., Resident Name, IOT Type, Device Name, Action and Access Time. Additionally, Administrators are also allowed to generate a copy of the access activities as well as export them into an Excel file. Sample screenshots are shown as below: |
| 1. In-Out Access Activities |
 |
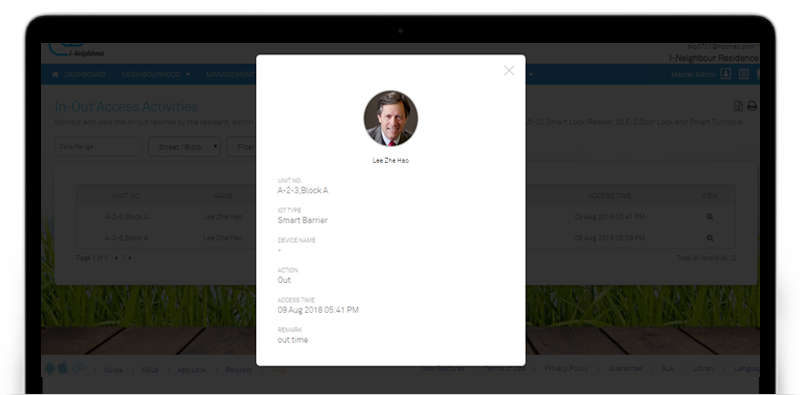
| 2. Resident’s Detail Pop-up |
 |
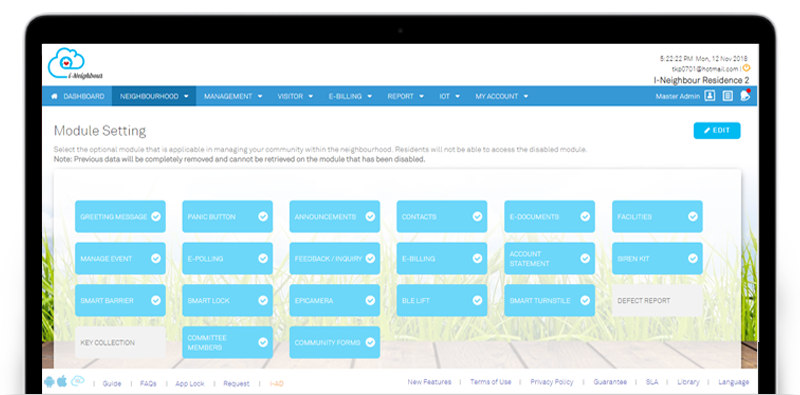
| Module Setting: Key Collection and Defect Report |
| Module Setting allows Administrator to manage useful modules within the neighbourhood. In the current version, Key Collection and Defect Report modules have also been released for developers. As such, for neighbourhoods that are no longer managed by the developer, the stated modules will be disabled from the setting. Likewise, Administrators are allowed to enable it the supposed modules are still applicable within the neighbourhood. To enable the modules, kindly proceed to Neighbourhood > Settings > Module Setting. |
 |
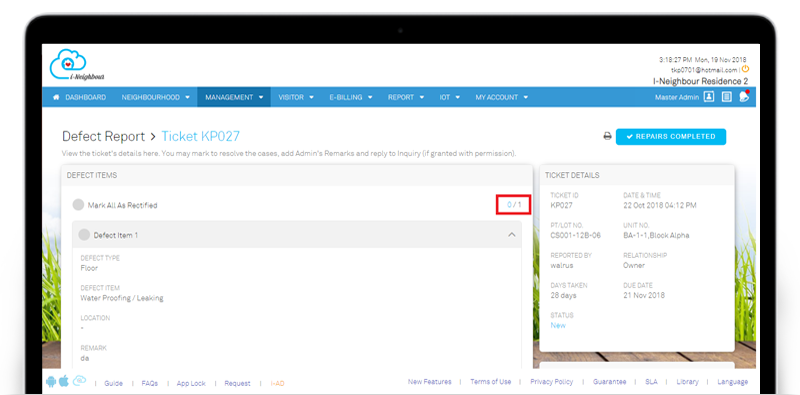
| Defect Report Enhancement |
| Defect Report allows Unit Owners to submit the unit’s defect reports to the Management Team. As for Administrators, they are able to monitor and update the progress of the submitted defect report, such as Rectify Defect Item, Mark as In-Progress/Pending Signature, Close Ticket and etc. Minor enhancement has been added in which the total amount of defect items will now be displayed for the Administrators. This allows Administrators to receive the total amount of rectified or total defect items. |
 |
| Dashboard View |
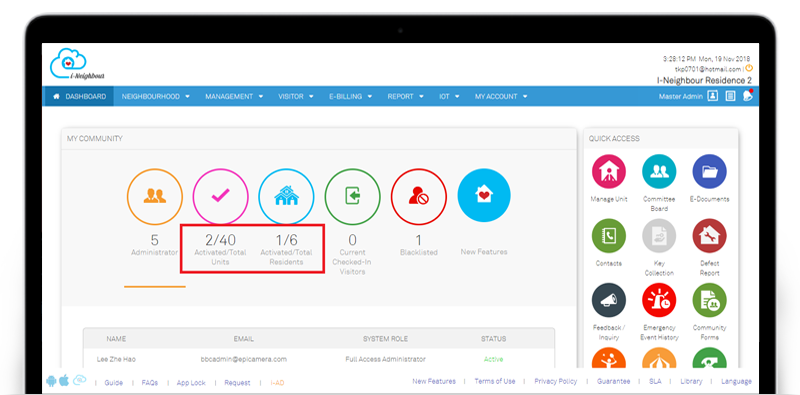
| For Administrators, the data display at dashboard view has been enhanced by including the following: |
| 1. Activated / Total Units |
| 2. Activated / Total Residents |
| In previous version, dashboard displays only the total activated units or residents, without informing Administrators of the total amount. As such, with the enhancement, Administrators are now able to obtain a better overview of the neighbourhood. |
 |
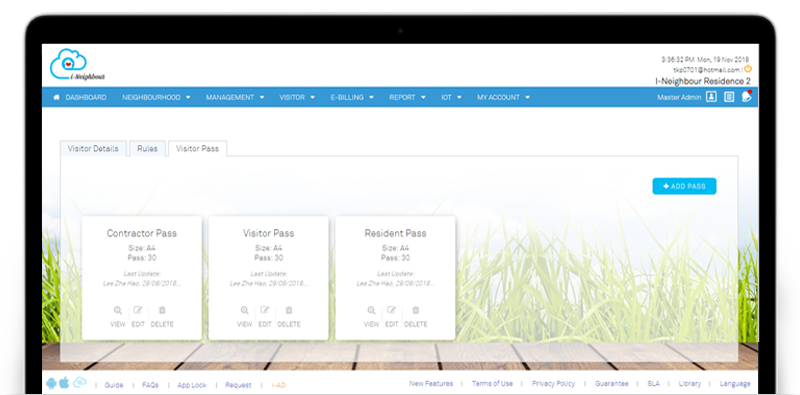
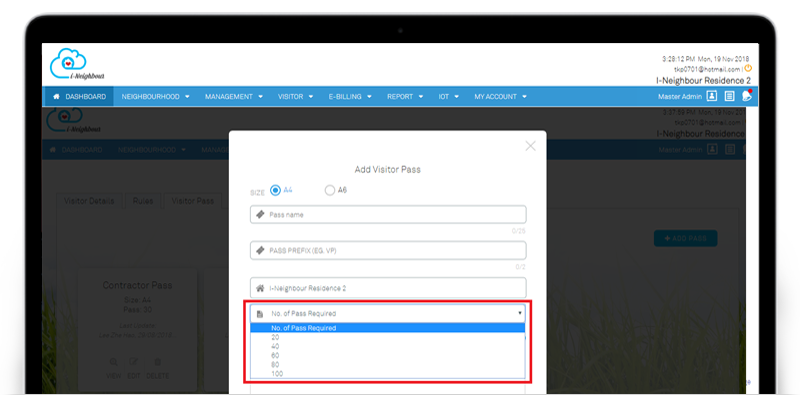
| Visitor Pass Template |
| Visitor Pass Template is recommended for the Visitor Management System, whereby Security Guards can now check-in the visitors by entering the Visitor Pass No. of the printed pass as well as check-out via the Scan QR Code function. This helps to speed up the entire check in-out process. Through Visitor Pass Template module, besides configuring Pass Name, Prefix, Neighbourhood Name, Visitor Parking Lot No. and etc, Administrators are also allowed to export up to 100 visitor passes for a template. Note that the available template sizes are A4 and A6. Sample screenshots are shown as below: |
| 1. Visitor Pass Template Listing |
 |
| 2. Add / Edit Visitor Pass |
 |
| i-Neighbour Mobile App Updates |
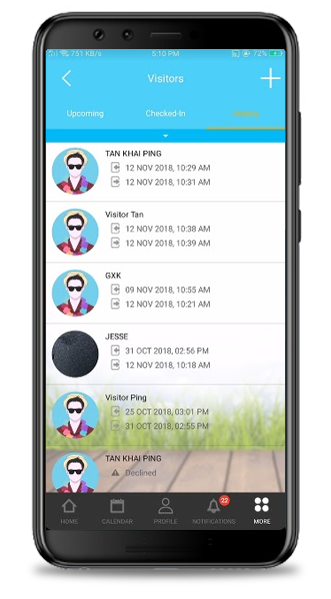
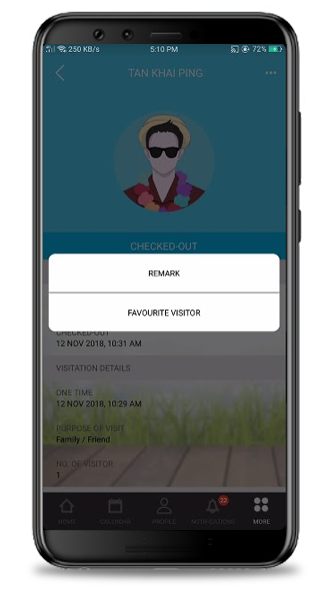
| 1. Visitor Listing
Visitor Listing for resident’s view has been enhanced by including features such as adding of invitation remark and performing invitation directly from the Visitor Listing. Invitation Remark - Residents can now add in additional remark or important note for the scheduled invitation. Note that the Remark will not be displayed to the public. Invitation - Residents are allowed to add new invitation directly from the Visitor Listing page, without having to quit the listing and proceed to invitation module. |
  |
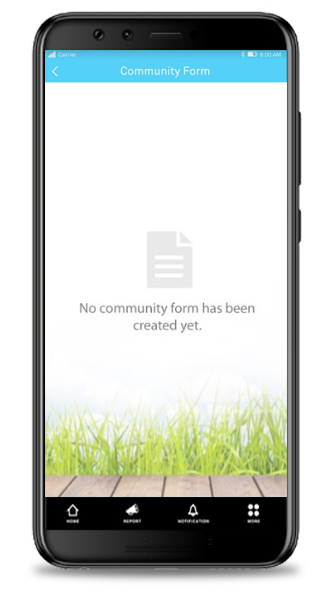
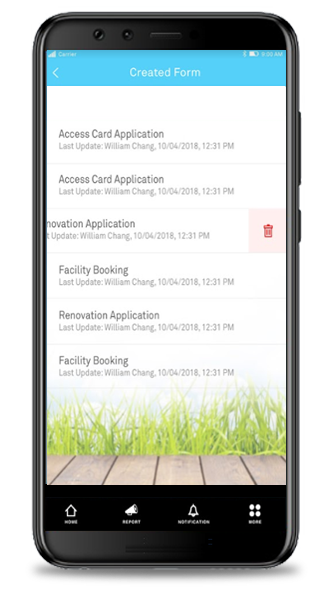
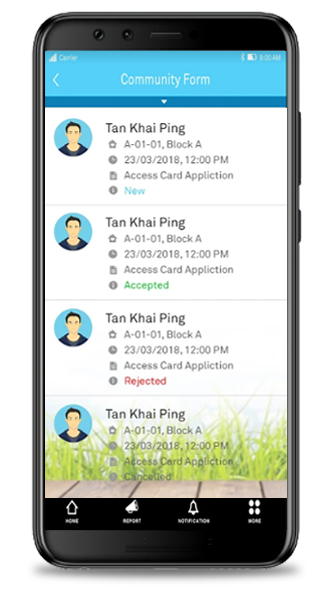
| 2. Community Form
Similar with Web Portal, Community Form module has been released to the Mobile App to ease the residents in filling up and submitting the form online, without having to walk-in. As for Administrators, they are now allowed to update the status, insert progress update and share to guard (if necessary) regarding the submitted forms. Note that new community form can only be created through Web Portal. Additionally, the forms cannot be edited via Mobile App. |
  |
  |
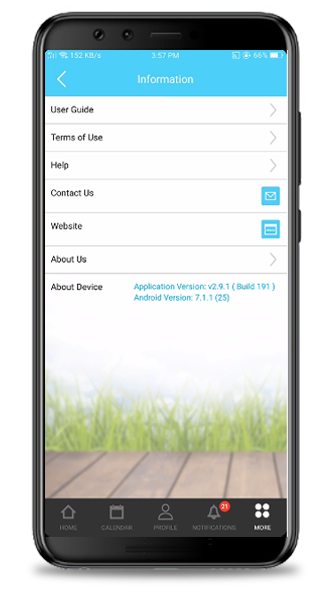
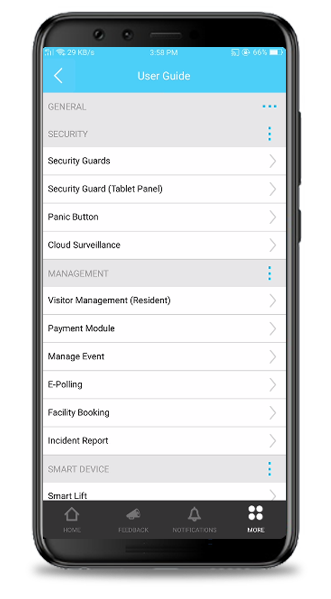
| 3. User Guide
For both Administrator’s and Resident’s role, the user guides for the latest modules have been updated and are now made available. User guides are divided into sections, according to its category (General, Security, Management, Smart Device and etc). This helps in assisting both Administrators and Residents to better understand how the overall process works. To view the user guides, please click on: More > Settings/Information > User Guide. |
  |
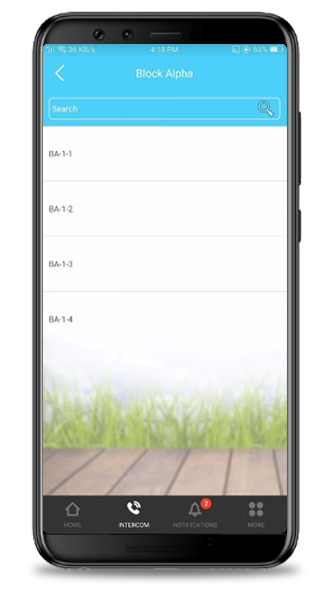
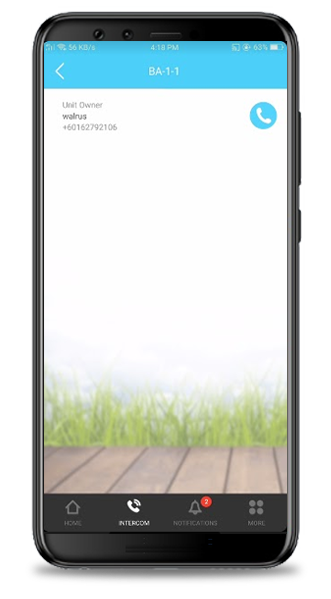
| 4. Security Guard: Intercom Module
For Security Guards, the process logic on the Intercom module has been enhanced. The listing will now display the contact according to the list as per configured by the unit owner. In case the unit owners has rented out their unit, they are allowed to update the contact list, by inputting all of the tenant’s contact. |
  |
| 5. Security Guard: Contact Module
For Contact module, the contact no. will be removed and security guards can only view the displayed name. This is to improve the privacy aspect whereby most neighbourhoods would prefer if their contact no. is hidden from the security guard’s view. |
 |
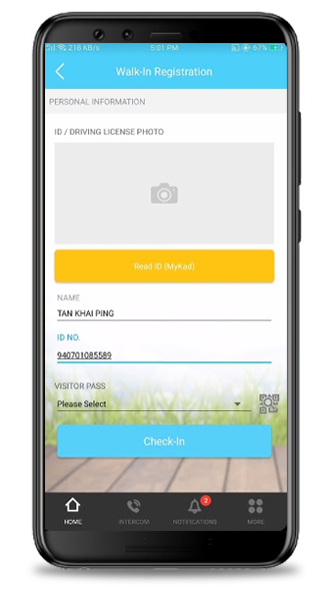
| 6. Security Guard: Walk-In Registration Form
Upon performing walk-in registration, the check-in time has now been delayed due to security guards having to manually key in or select the visitor pass from the drop down listing. In order to improve the speed of performing walk-in registration, Scan QR Code function has been added into the walk-in registration form. Therefore, the security guards can now scan on the QR Code, (obtained from the visitor pass) by clicking on the “Scan Code” icon. |
 |
| Previous Issue: October 2018 • September 2018 • August 2018 |
| Note: If some of the screenshots or steps viewed here are different from the ones in the current system, this is due to our continuous effort to improve our system from time to time. Please notify us at info@i-neighbour.com, we will update it as soon as possible. |