 |
| i-Neighbour Features: User Guides |
|
i-Neighbour is a comprehensive Smart Community Solution that encompasses various features which not only ease the Management of a neighbourhood but also to provide a smart lifestyle for the residents.
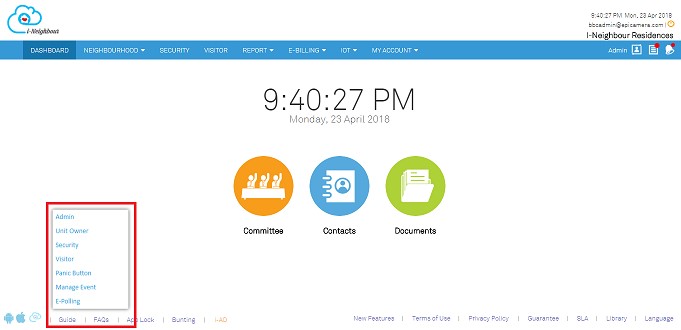
However, seeing that many of i-Neighbour’s features are rather extensive and not wanting users to miss out on certain functions; we’ve decided to include detailed user guides for the features implemented in i-Neighbour in order to promote a better overall user experience when utilizing i-Neighbour. For both Administrator and Resident, user guides are now accessible at Dashboard > Footer > Guide. 1. Dashboard View |
|||
 |
| E-Billing: Payment Received and E-Receipt Mailer |
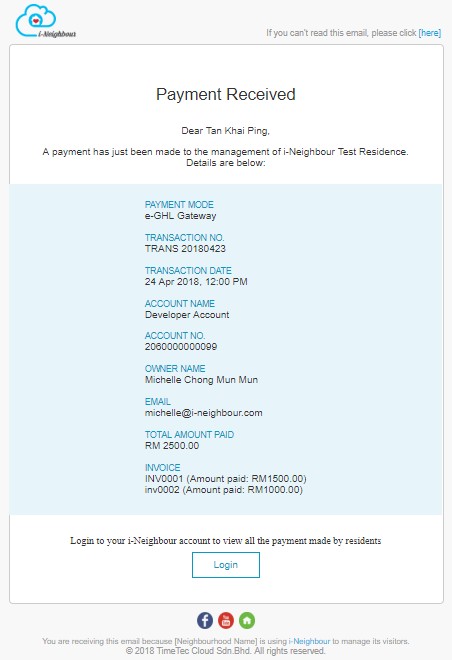
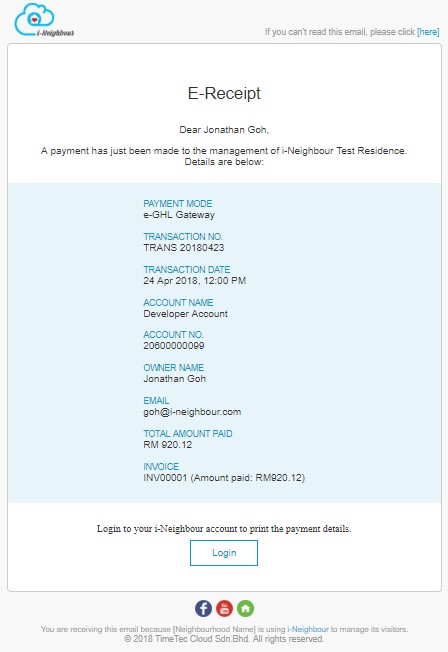
| E-Billing module allows administrator to upload invoices to specific units and the resident of the unit will then be able to view the uploaded invoices thus allowing he/she to proceed with the online payment through i-Neighbour. Once the payment has been successfully made, the resident will in turn receive an E-Receipt, generated by i-Neighbour through mailer.
Additionally, the system will also send a Payment Received mailer to the administrators of the neighbourhood. This allows them to be notified and able to easily keep track of the collected payment. Sample screenshots are shown as below: 1. Payment Received (Administrator) |
|||
 |
|||
| 2. | 2. E-Receipt (Resident) | ||
 |
|||
| Invoice Listing: Invoice Type Filter and Export Feature |
| Through Invoice Listing, filter by Invoice Type is now available for administrator to filter the listing according to their preference. Besides, Filter and Search function such as Date Range, Transaction Detail, Status and Street or Block are still maintained as in the current version.
Furthermore, administrator are now allowed to export the uploaded invoices, as displayed in the listing table to excel file. This helps the administrators to save a copy of the data for future reference. Kindly proceed to E-Billing > Invoices > Export icon to download. |
|||
 |
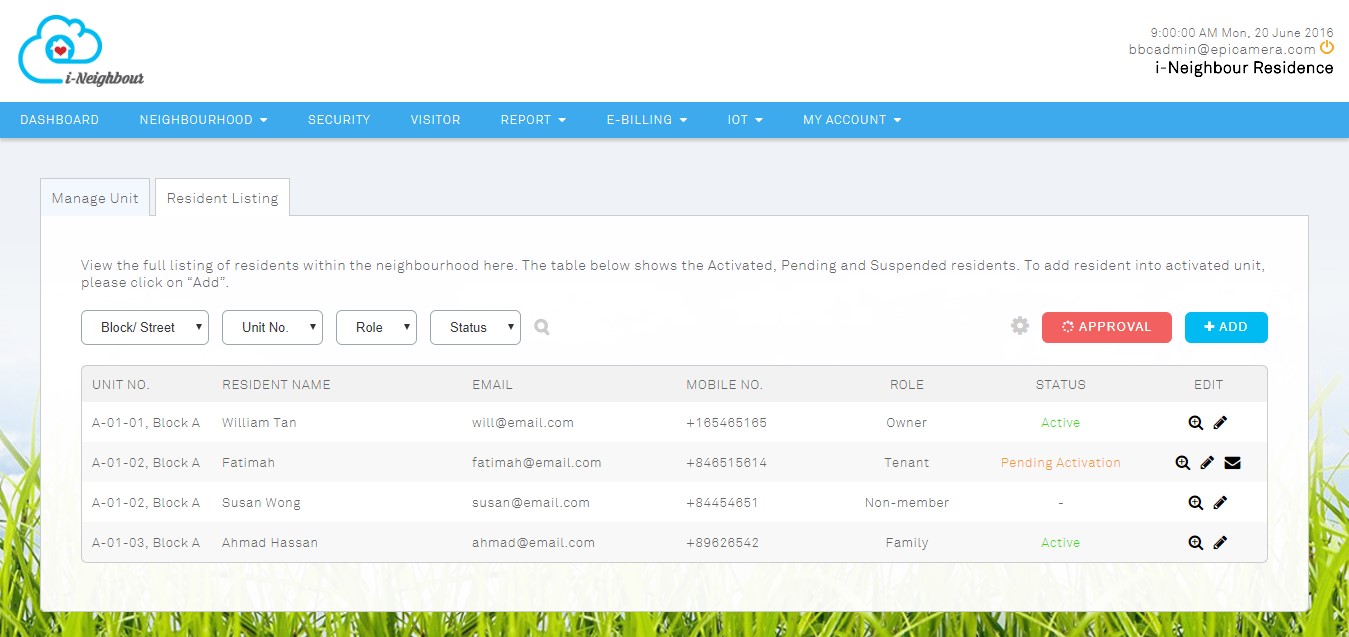
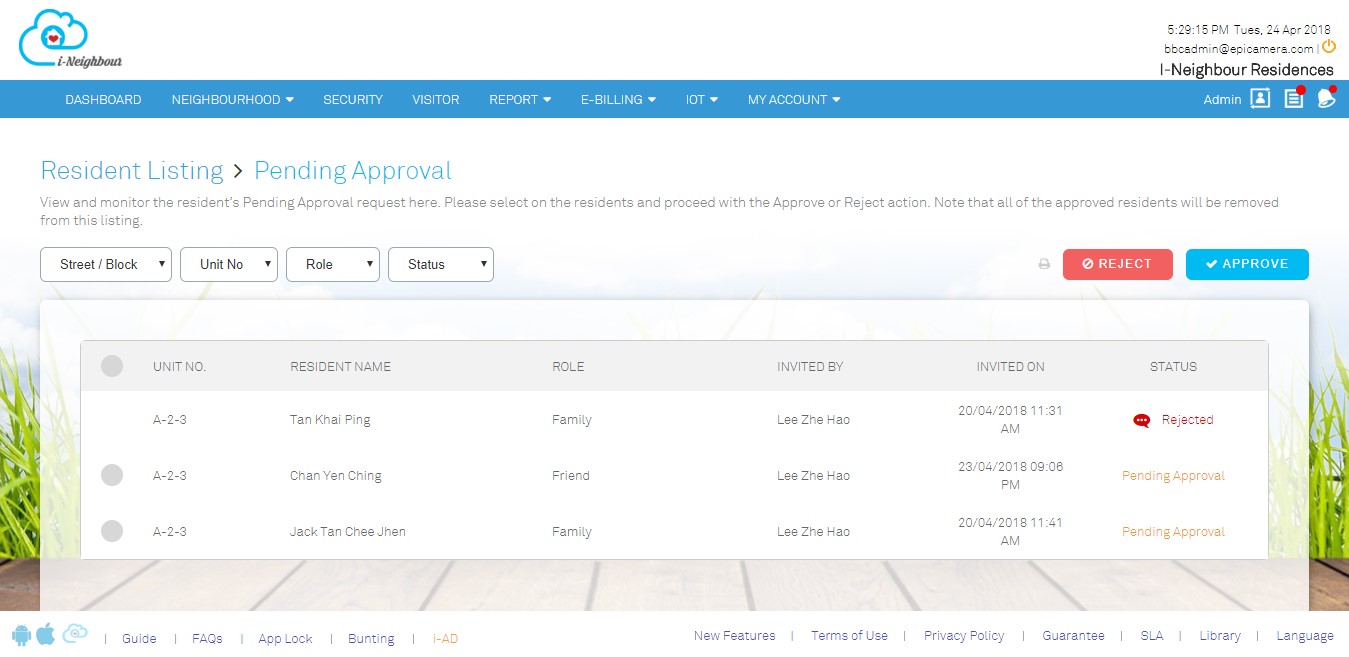
| Manage Unit: Resident Listing |
| Resident Listing module is now available for Administrators to monitor and be updated on the total amount of added residents within the neighbourhood. The listing will display all the resident roles, such as Unit Owner, Family Members and Tenant. Besides, Administrators are also allowed to add a resident for a specific unit on behalf of the Unit Owner.
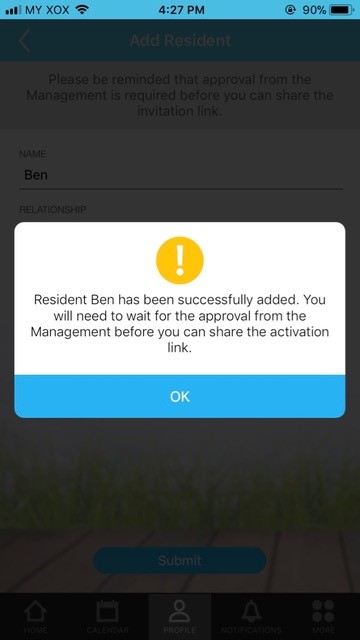
What’s more, Administrators are now allowed to enable the approval rules which require approval from the Management when the Unit Owners add a new resident. In this case, the Administrators will receive an alert if there is a pending approval resident, and can proceed with the Approve or Reject action. Note that reason must be included if rejecting an approval. However, this option will be disabled by default. Please be informed that the Administrators can enable it through the “Settings” icon at the resident listing page. On the other hand, once enabled, Unit Owners are not allowed to add resident and share the invitation link immediately, until the request has been approved. Sample screenshots are shown as below: 1. Resident Listing |
|||
 |
|||
| 2. | Pending Approval Listing | ||
 |
|||
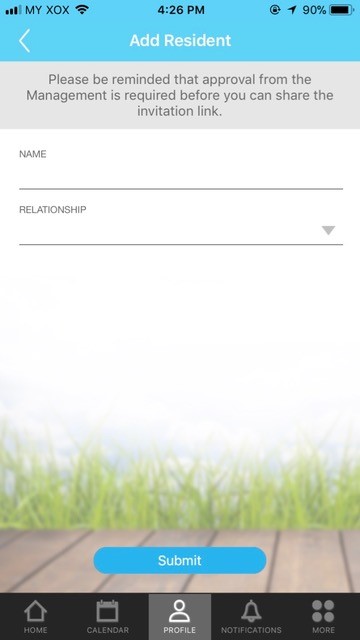
| 3. | Add Resident | ||
 |
|||
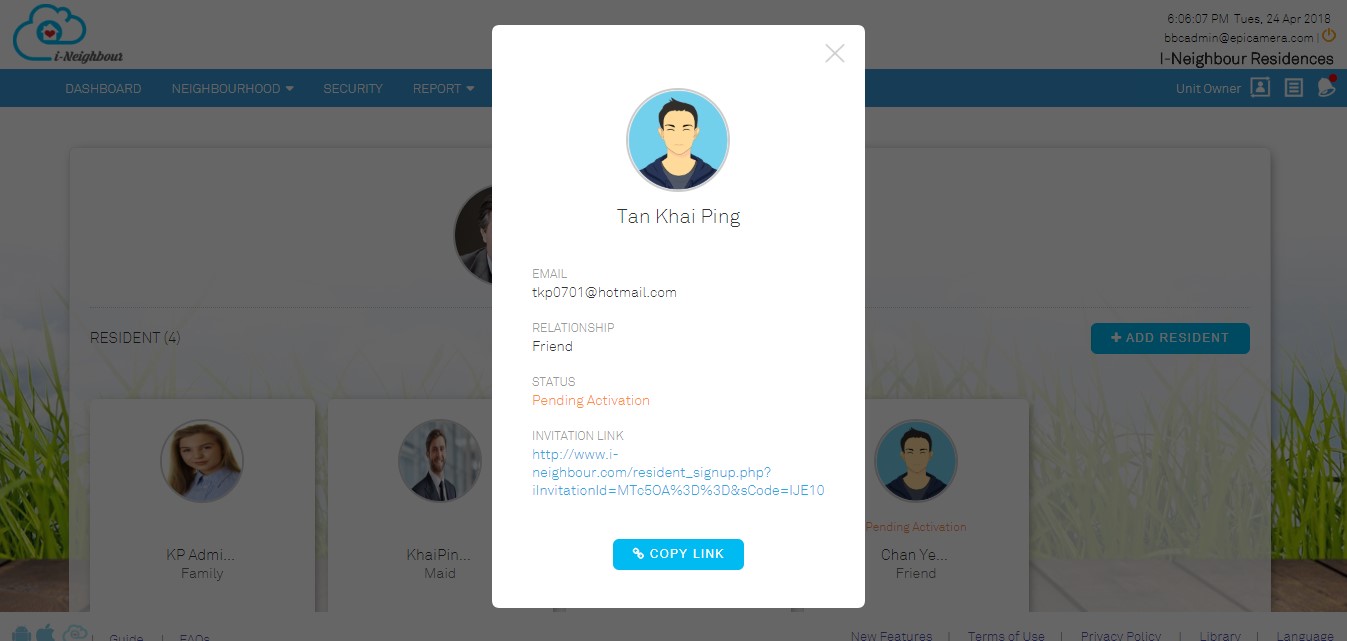
| (Unit Owner) My Unit Listing |
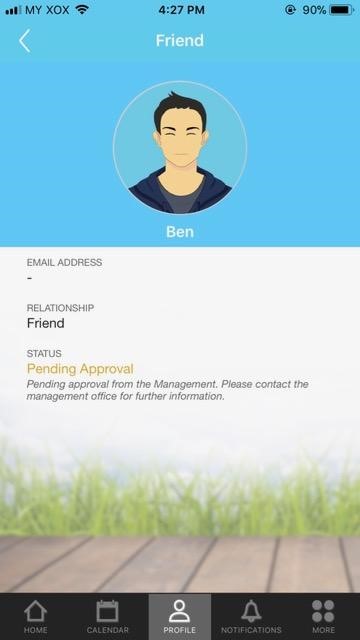
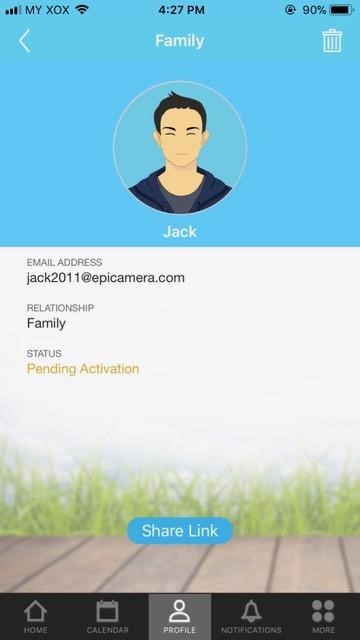
| UI design for My Unit listing page has been enhanced, whereby the unit owner is now able to view the added residents along with the status: Activated, Pending Activation or Pending Approval. Through “Add Resident” action button, Admins are allowed to add resident and obtain the invitation link immediately. However, if the Management has enabled the approval rules, then this will require an approval from Management before proceeding with obtaining the invitation link. Sample screenshots are shown as below: 1. My Unit Listing |
|||
 |
|||
| 2. | Add Resident | ||
 |
|||
| 3. | Pending Activation Details | ||
 |
|||
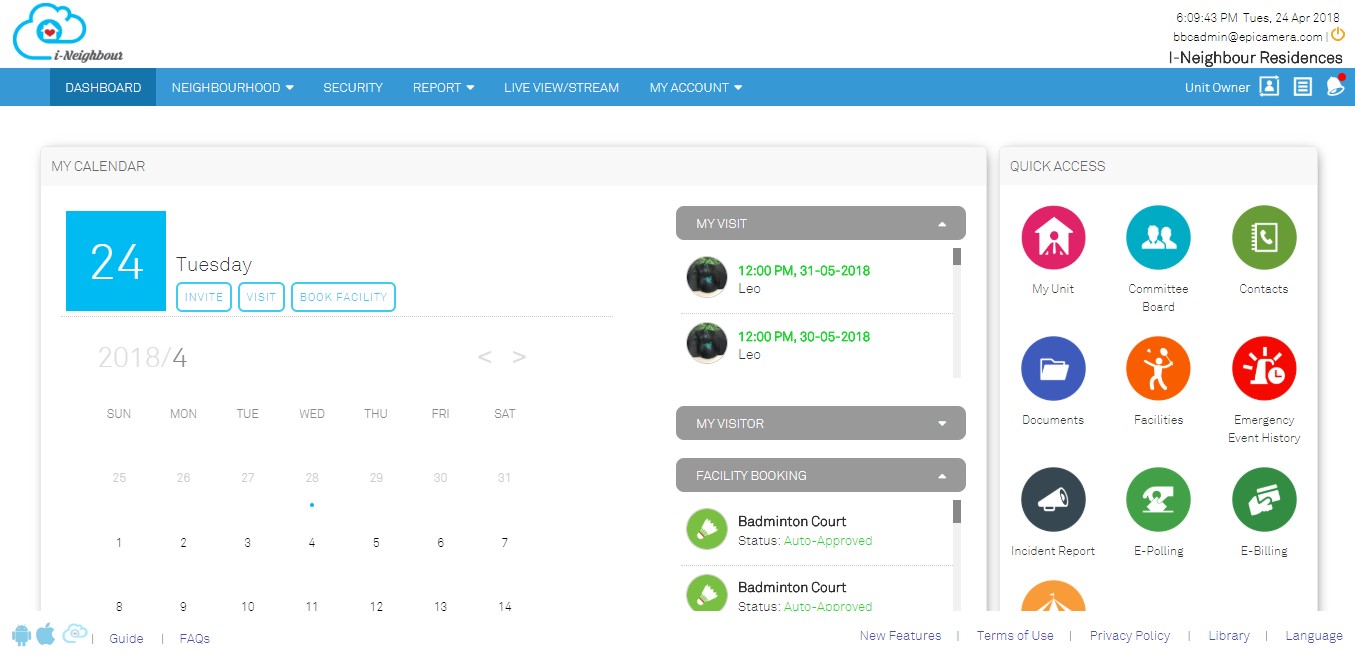
| Resident’s Dashboard |
| Dashboard is now ready and provides residents with a summarized view of activities on the selected date. As an example, residents are able to view the list of invitation, visitation and facility booking without having to access to the specific module.
Additionally, Quick Access section is displayed at the right panel, which allows the residents to access the modules in just one click. |
|||
 |
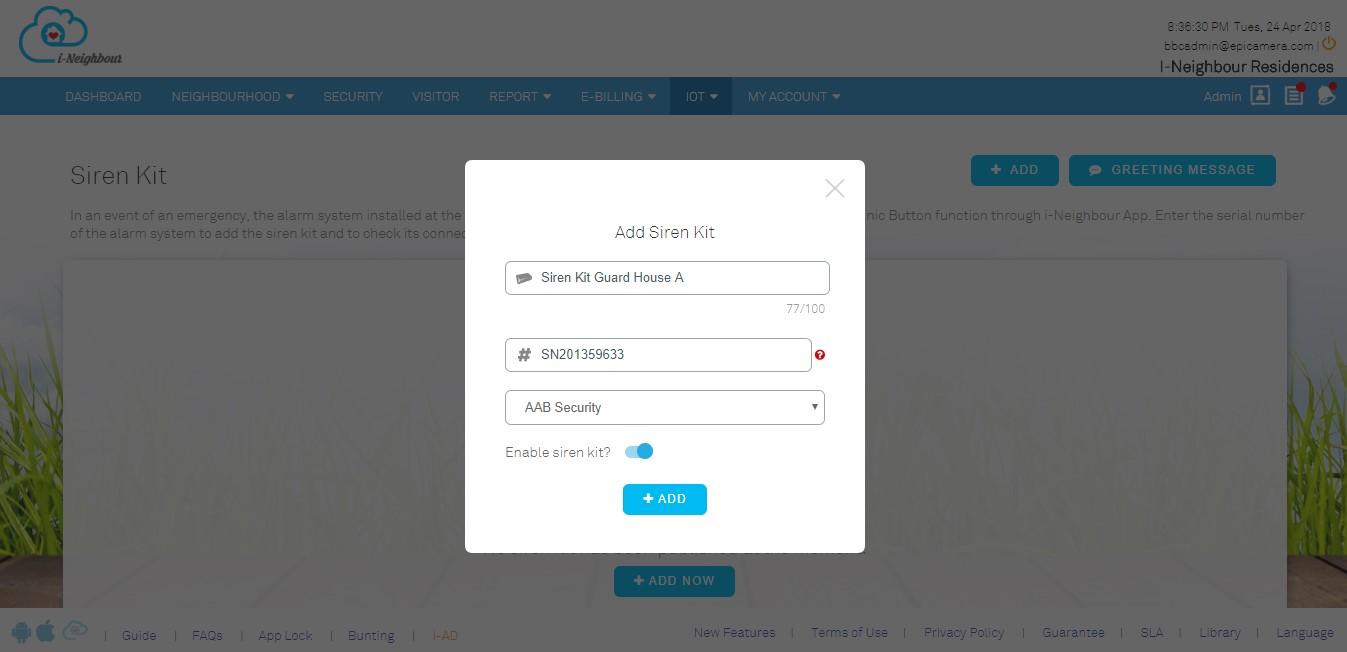
| Siren Kit |
| When a resident pushes the Panic Button from the i-Neighbour App during an emergency, the installed Siren Kit will be triggered and set off the siren to alert the security guards on-duty. Administrators who have been added as the emergency contact person will also be notified through notification and the emergency event will likewise be recorded. Alternatively, when a security guard faces any emergency, he/she is allowed to trigger the Panic Button through the Siren Kit. This will alert the Administrators about the emergency and able to proceed accordingly. An additional field on the Guard House Account has also been added into the Add/Edit Siren Kit pop-up. This allows the system to record the Siren Kit that belongs to the respective guardhouse. |
|||
 |
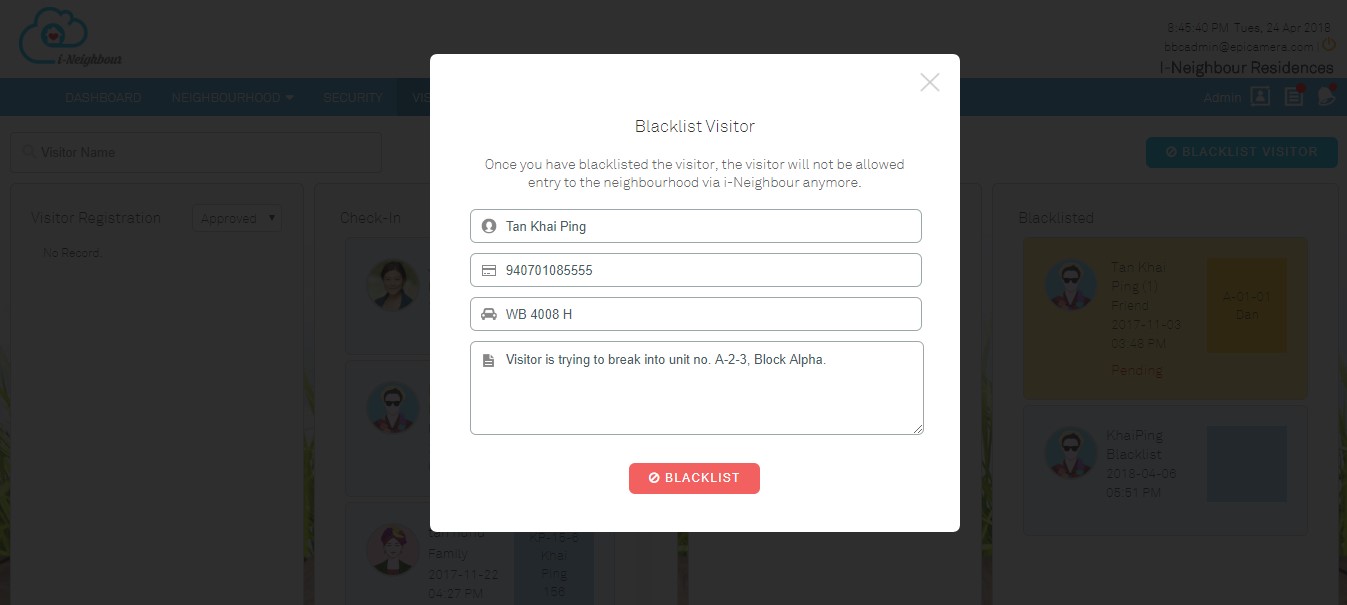
| Blacklist Visitor |
| In the Visitor Management System, Administrators are allowed to blacklist the visitors with a valid reason. This helps to alert the guards on-duty from checking in a blacklisted visitor. During the blacklisting visitor process, administrators are also able to blacklist the visitor through Car Plate No. (mainly for drive-in visitors.) | |||
 |
| i-Neighbour App Updates |
| 1. (Unit Owner) My Unit | |||||||
| ● | Through Web Portal, Administrators are allowed to enable the approval rules for the added residents according to the neighbourhood. | ||||||
| ● | Once the Administrators have enabled the rules, Unit Owners are required to wait for an approval from the Management before proceeding to share the invitation link with the added resident. | ||||||
|
|||||||
|
|||||||
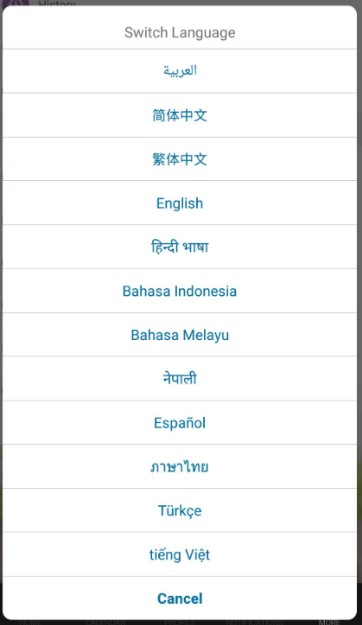
| 2. Switch Language | |||||||
| ● | i-Neighbour Mobile App supports up to 12 language translations, which allow worldwide users to select the appropriate language. | ||||||
| ● | In Settings > Switch Language, the UI design for pop-up selection list has been standardized for all user roles. | ||||||
 |
|||||||
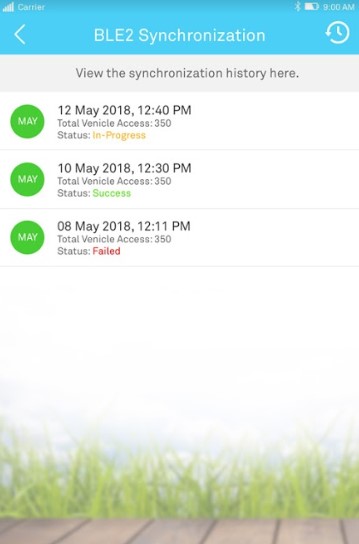
| 3. UHF Sticker No. Synchronization | |||||||
| ● | Access barrier gate through UHF Sticker No. is one of the option under Vehicle Access Pass. If the neighbourhood is using TimeTec Long Range RFID Reader paired with BLE-2 controller; the synchronization will require the inputted UHF Sticker No. to be passed from the web portal to controller. | ||||||
|
|||||||
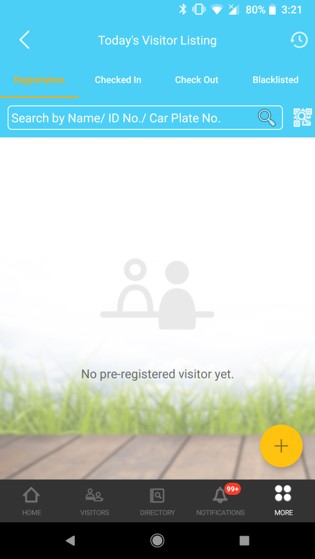
| 4. Today’s Visitor Listing: No Pre-Registered/Checked-In Visitor | |||||||
| ● | Alert message will be displayed for both Administrator and Guard when there is no pre-registered or checked in-out visitor. | ||||||
 |
|||||||
| 5. Walk-In Registration Form: Last Visitation Date | |||||||
| ● | Last visitation date of the visitor will be displayed at the top part of the walk-in registration form during visitor check-in. | ||||||
| ● | This allows the guards to monitor and be informed of when the visitors checked-out and check-in again within a short period of time. | ||||||
 |
|||||||
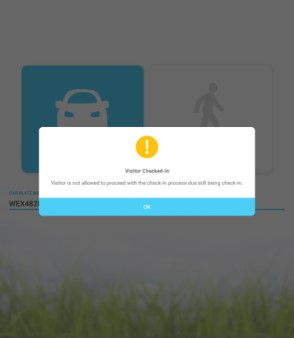
| 6. Walk-In Registration Form: Checked-In Visitor | |||||||
| ● | During walk-in registration, the system will perform verification on the checked-in visitor by capturing ID No. or Car Plate No. Visitors who are already checked-in will be blocked when trying to check-in again. | ||||||
| ● | Guard will receive an alert message if this situation happens. | ||||||
 |
|||||||
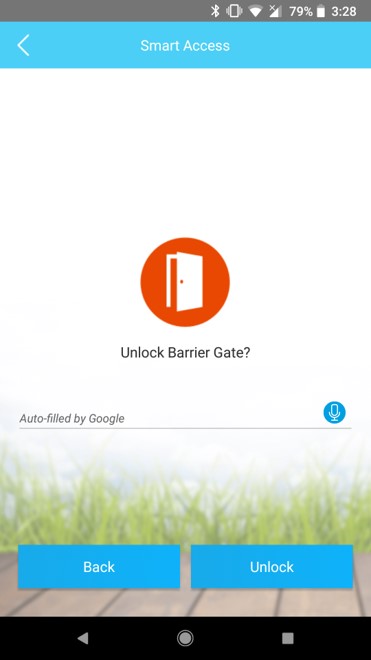
| 7. BLE-2 Voice Command | |||||||
| ● | For residents accessing via Mobile App, the Barrier Gate access can be executed via voice command without having to touch the device. | ||||||
| ● | Additionally, the text has been simplified to “Unlocking Barrier Gate?” which reduced the loading time and fasten up the process of triggering Barrier Gate. | ||||||
 |
|||||||
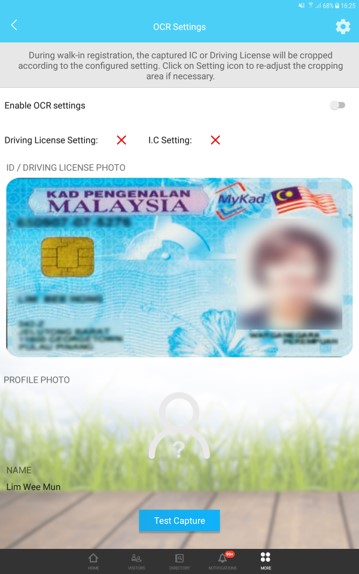
| 8. Smart Panel: OCR Module for Walk-In Visitor | |||||||
| ● | Optical Character Recognition (OCR) is now available to reduce the time during check-in whereby personal data (Name and ID No.) can be converted into machine-encoded text just by capturing the ID. | ||||||
| ● | In the latest version, Driving License is also supported, which allows visitor to choose either to provide their ID or Driving License. | ||||||
| ● | Additionally, the profile photo of ID or Driving License will be captured and displayed as under the visitor profile photo as well. | ||||||
| ● | Note that the Administrators or Guards are advised to configure the OCR Settings first before proceeding with the OCR feature. Kindly proceed to More > Settings > OCR Settings for configuration. | ||||||
|
|||||||

| Previous Issue: March 2018 • February 2018 • January 2018 |
| Note: Some of the screenshots viewed here might be different from the ones in the current system due to our continous effort to improve TimeTec from time to time. |