 |
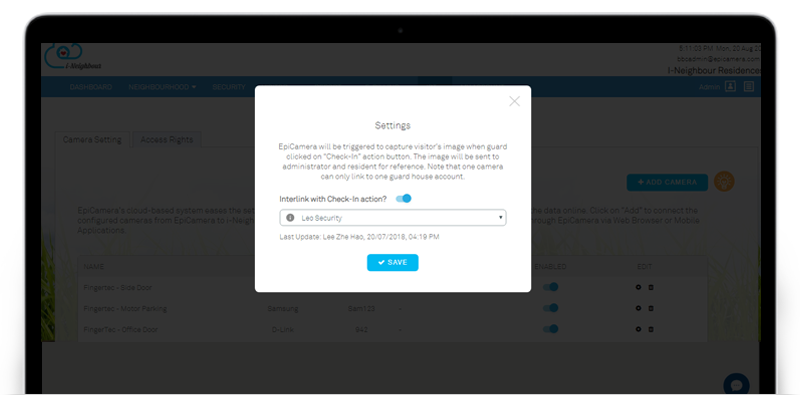
| EpiCamera Interlinked with Visitor’s Check In-Out |
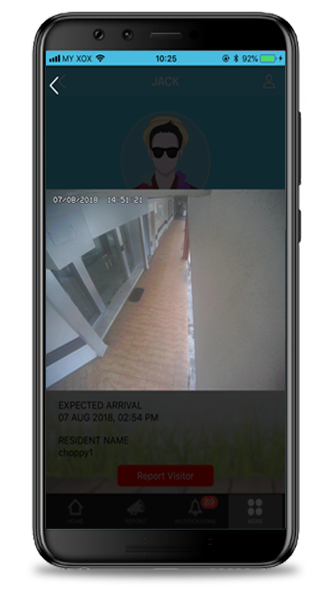
| Similar with Smart Devices, Administrators can now interlink the visitor’s check in-out action with the installed EpiCamera. During visitor check in-out process, the installed EpiCamera will be triggered automatically to capture the footage once the action button for Check In-Out is initiated by the Security Guards. This allows both Administrators and Residents to receive a footage and verify the visitor’s identity, while simultaneously boost the security level. To configure the EpiCamera settings, please click on IOT > EpiCamera > Camera Setting.
|
 |
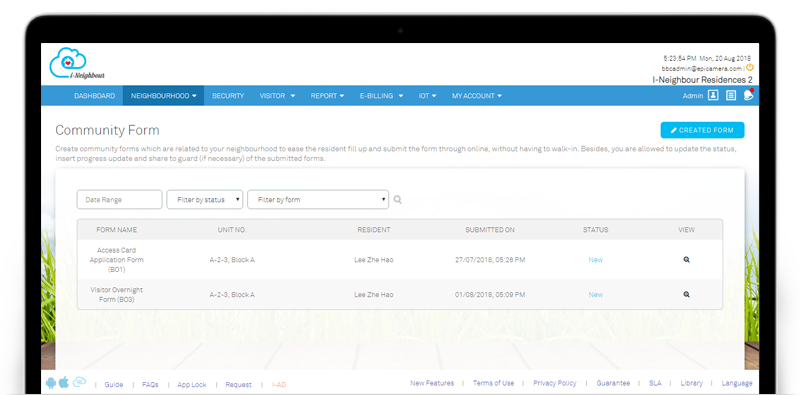
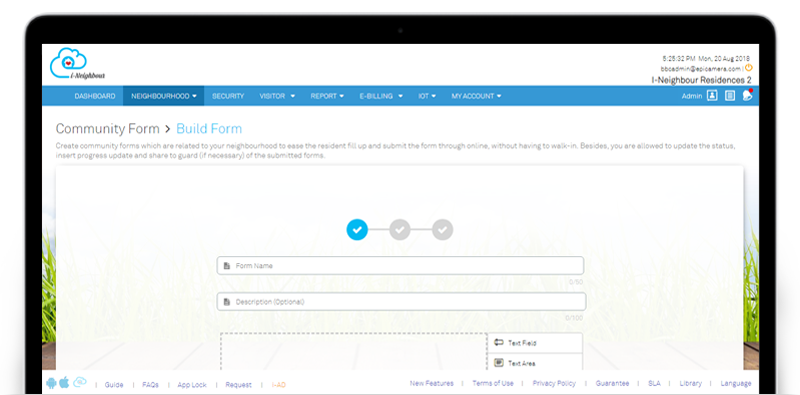
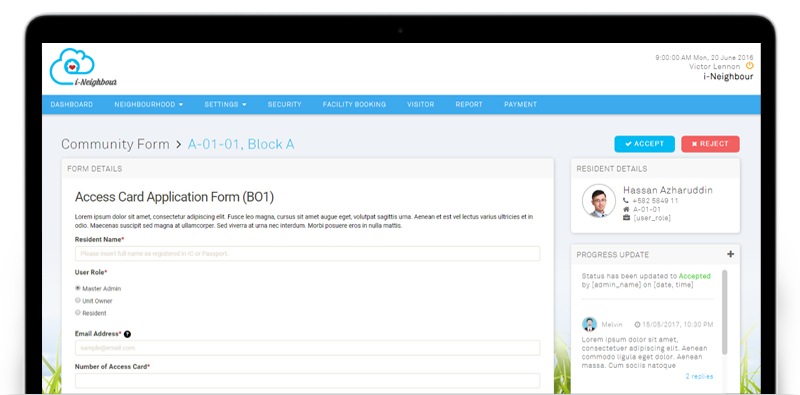
| Community Forms |
| Administrator can now create community forms, such as Car Park Access Application Form, Renovation Request Form and etc, which are related to the neighbourhood. This ease the resident in filling up and submitting the form through online, without having to walk-in. Besides, Administrators are also allowed to update the status, insert progress update and share to guard (if necessary) regarding the submitted forms. Sample screenshots are shown as below: |
| 1. Community Forms Listing |
 |
| 2. Create New Community Form |
 |
| 3. Community Form Details Page |
 |
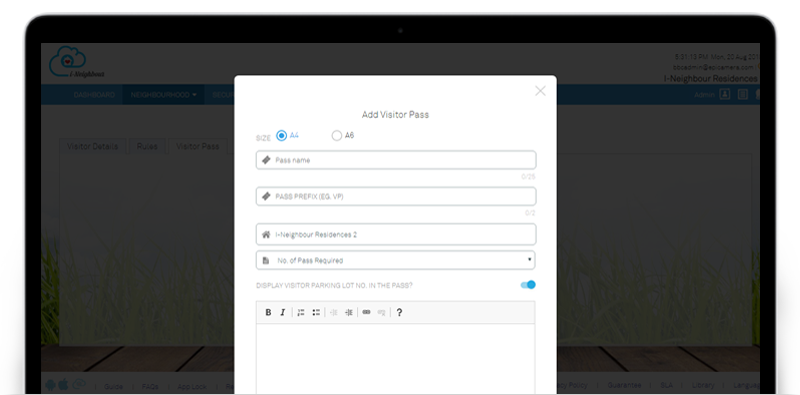
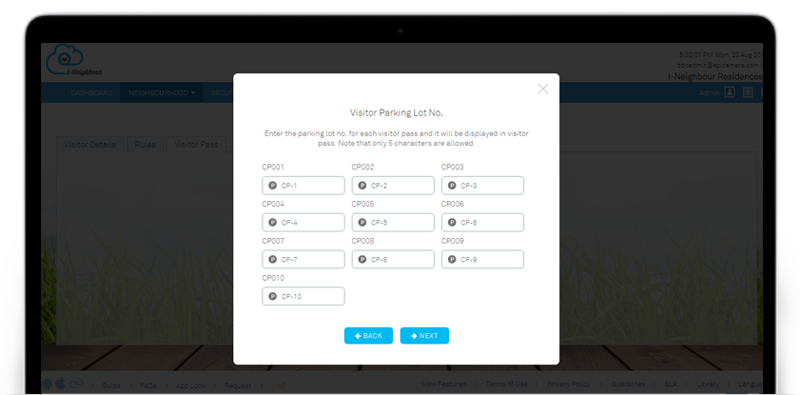
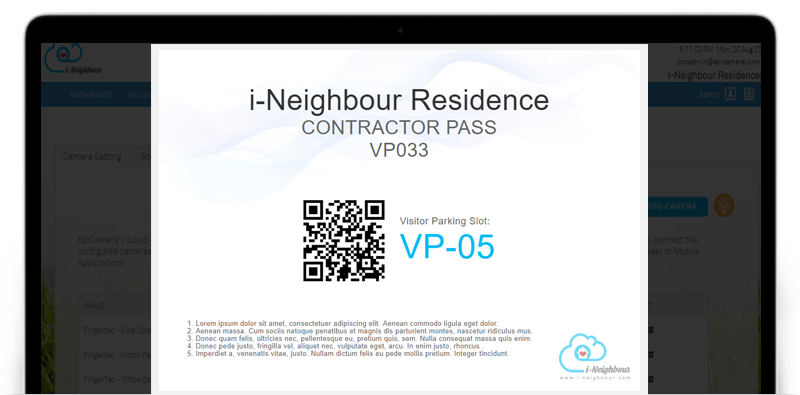
| Visitor Pass Template |
| Visitor Pass Template is now available and can be used in the Visitor Management System. Security Guard can just check-in the visitor by entering the Visitor Pass No. of the printed pass, and check-out via the Scan QR Code function. This helps hasten the check-out process, where the Security Guard can just scan the QR Code without having to search the Visitor Name or ID / Driving License No. Through visitor pass template module, Administrators are allowed to customize the information displayed on the visitor pass, such as Pass Name, Prefix, Neighbourhood Name, Visitor Parking Lot No., Remarks and etc. Note that the available template sizes are A4 and A6. |
| 1. Add Visitor Pass |
 |
| 2. Configure Visitor Parking Lot No. |
 |
| 3. Visitor Pass Template |
 |
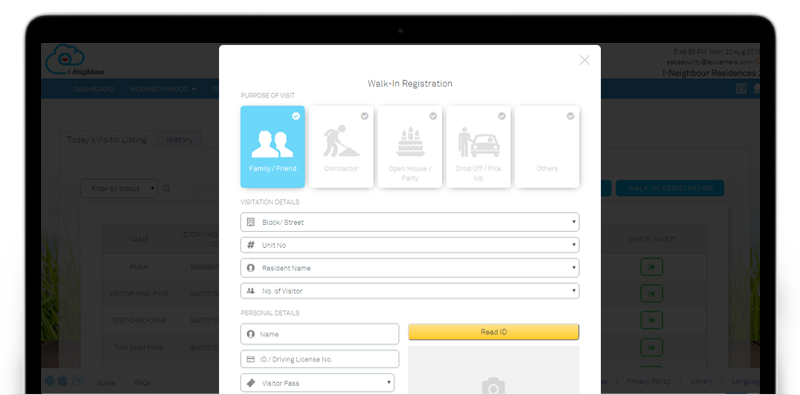
| Walk-In Registration and Scan QR Code Form |
| To be standardized with the Mobile App version, both Walk-In Registration and Scan QR Code Form have been enhanced and simplified by reducing the redundant fields, whereby visitors will now only be required to provide the Resident’s Details and Personal Details (Name and ID/Driving License No.) While for Drop Off/Pick Up visitors, only their personal details will be required in order to proceed with the check-in process. Under the page on “Personal Information”, the fields are based on the Visitor’s Detail Settings, which can be configured through Visitor Settings. Note that Name and ID/Driving License No. are compulsory fields, while the others are customizable. |
 |
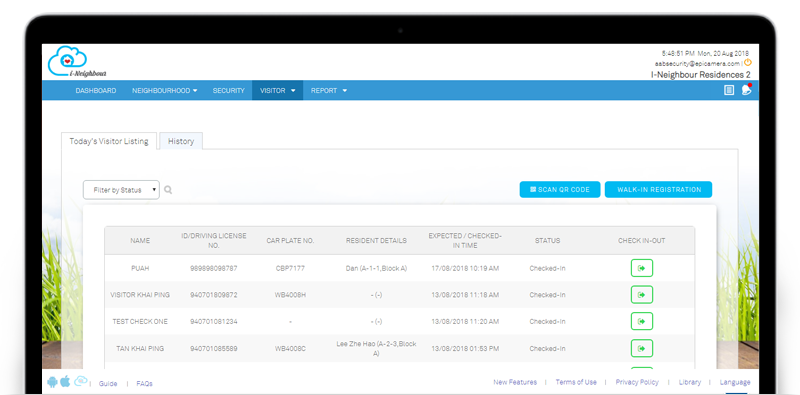
| Today’s Visitor Listing |
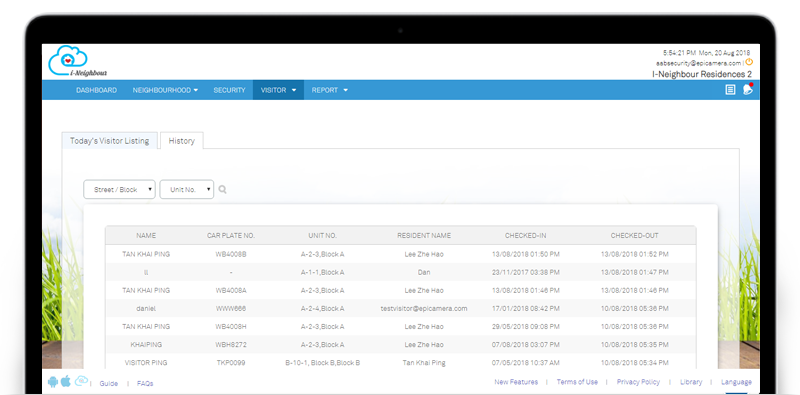
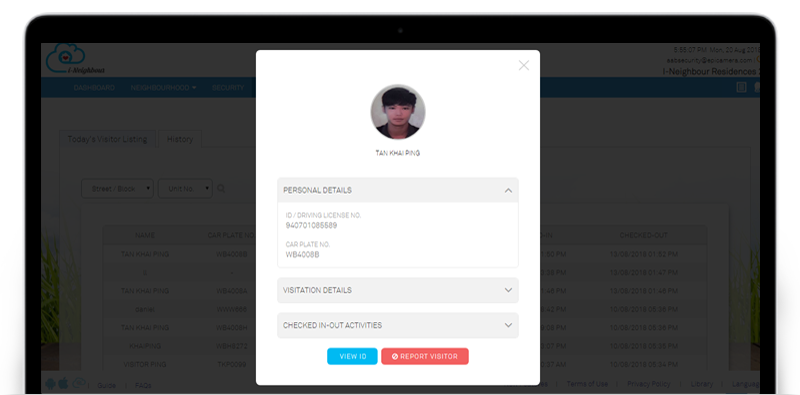
| UI Design of Today’s Visitor Listing has been enhanced to where the listing now displays all the Pending Approved Visitation, Approved Visitation and Checked In-Out Visitors within the neighbourhood. Security Guards are able to better monitor and search for the visitors, as the information such as Name, ID/Driving License No, Car Plate No. (if any) and Checked-In Time are clearly displayed together with the search and filter options. Besides, history listing on checked-out visitors can be obtained by clicking on the “History” tab. The listing will record all of the checked-out visitor’s information, including check in-out activities. Note that Administrators will be able to view the listing. The only difference is that Administrators are unable to perform the Check In-Out action. |
| 1. Today’s Visitor Listing |
 |
| 2. Checked-Out Visitor Listing |
 |
| 3. Visitor Details Page |
 |
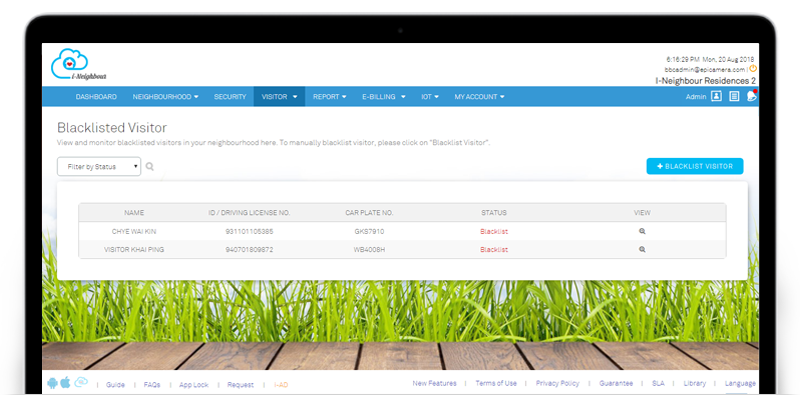
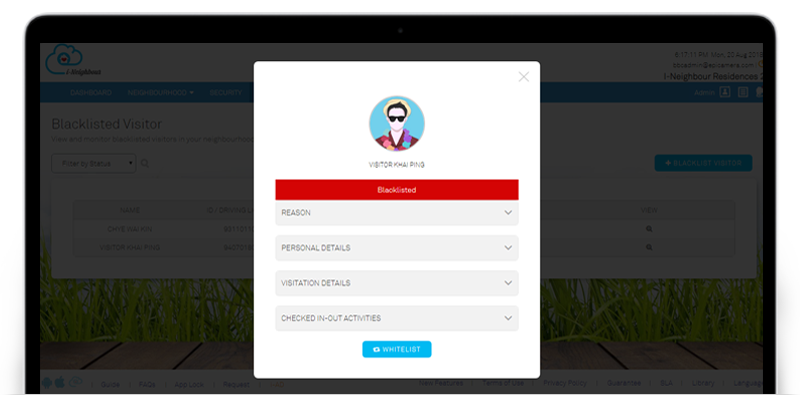
| Blacklisted Visitor |
| Blacklisted and Pending Blacklist visitors have been transferred and will be displayed in this module. Security Guards are allowed to blacklist the visitor by clicking on the “Blacklist” button. However, this action requires the approval from the Management Team. While for the Administrators, they are allowed to Blacklist the visitors after verification, which will then block the blacklisted visitors from entering the neighbourhood. If the Administrators wishes to remove the visitor from the Blacklisted status, kindly click on the “Whitelist” button at the visitor’s detail page. Sample screenshots are shown as below. |
| 1. Blacklisted Visitor Listing |
 |
| 2. Blacklisted Visitor Details Pop-up |
 |
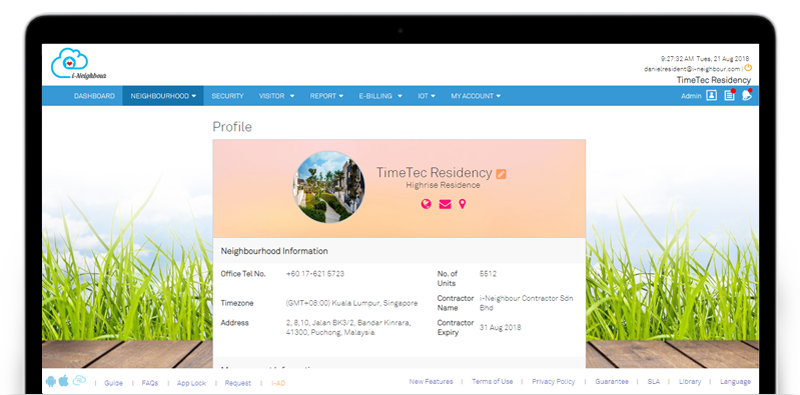
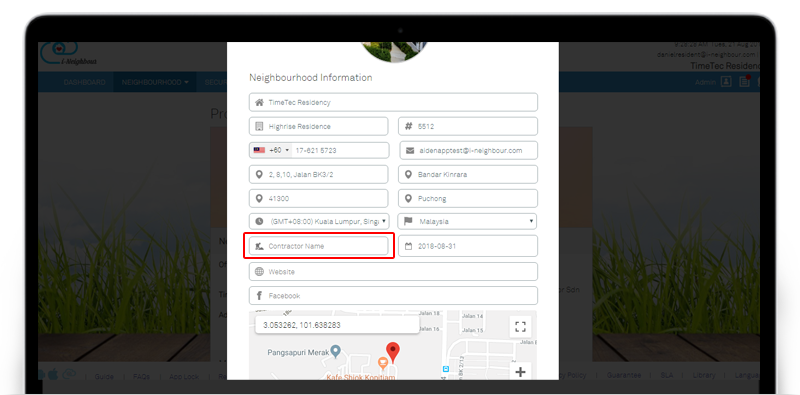
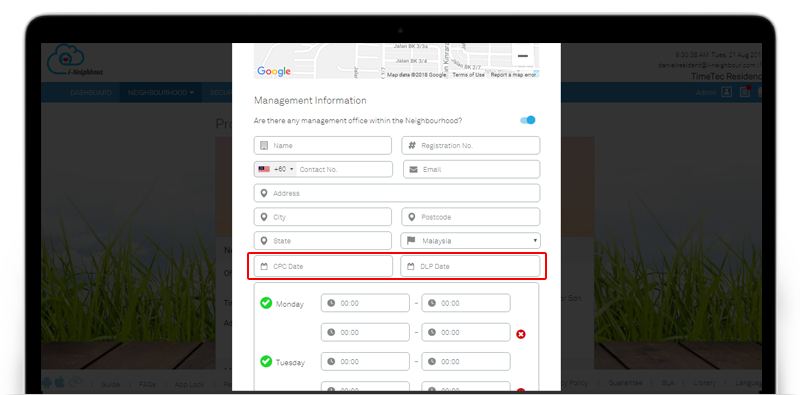
| Neighbourhood Profile |
| Additional fields such as Contractor Name and Expiry Date have been added into the Neighbourhood Profile, under the section Neighbourhood Information. This allows the Administrators to insert the appointed Contractor and it’s expiry duration, if necessary. Besides, CPC Date and DLP Date have been added under Management Information too. All these fields can be viewed by all of the residents. To configure the Neighbourhood Profile, please click on: Neighbourhood > Profile. |
| 1. Neighbourhood Profile |
 |
| 2. Neighbourhood Information |
 |
| 3. Management Information |
 |
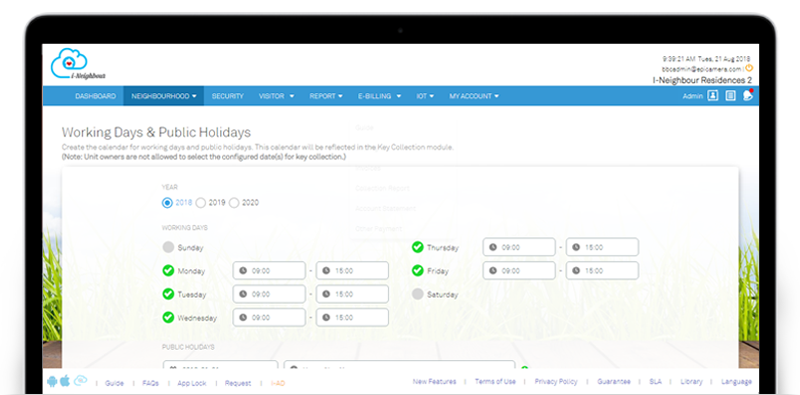
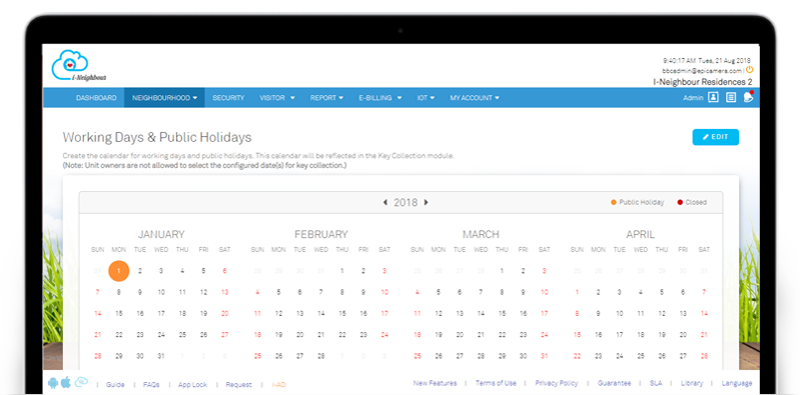
| Working Days and Public Holidays |
| Administrators can now create a calendar for working days and public holidays. In the module, working days and its operating hours are able to be defined while public holidays can be added according to the country. The configured calendar will then be reflected in the Key Collection module, whereby the residents are not allowed to perform booking on non-working days and public holidays. Note that the Key Collection module will be released in the upcoming month. Sample screenshots are shown as below. |
| 1. Calendar Configuration |
 |
| 2. Calendar Listing |
 |
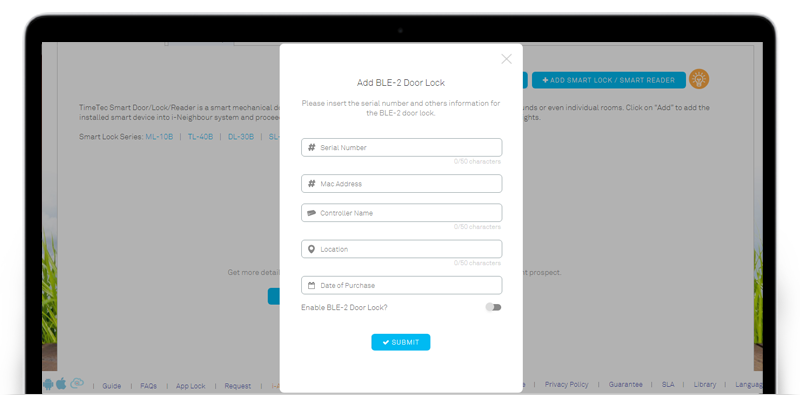
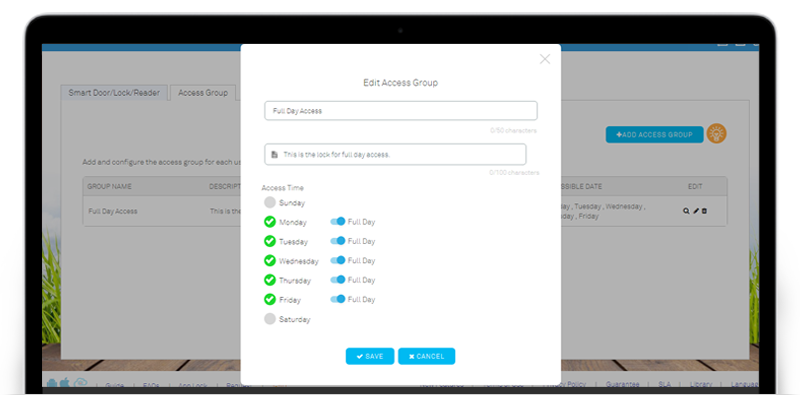
| Smart Devices: TimeTec BLE-2 Smart Door |
| Other than the current Smart Devices, such as Smart Lock and Smart Reader, TimeTec BLE-2 Smart Door is now integrated into i-Neighbour, which helps further tighten the system into a well-monitored and fully integrated system. Administrators can now add the installed Smart Door at facility room, lobby, management office and etc into the Smart Door/Lock/Reader module. Furthermore, the administrators are able to control the access into specific compounds by defining the access rights per smart door for the user roles such as Master Admin, Admins, Security Guards and Residents. View more details on TimeTec BLE-2 Smart Door at this link. |
| 1. Add TimeTec BLE-2 Smart Door |
 |
| 2. Access Group |
 |
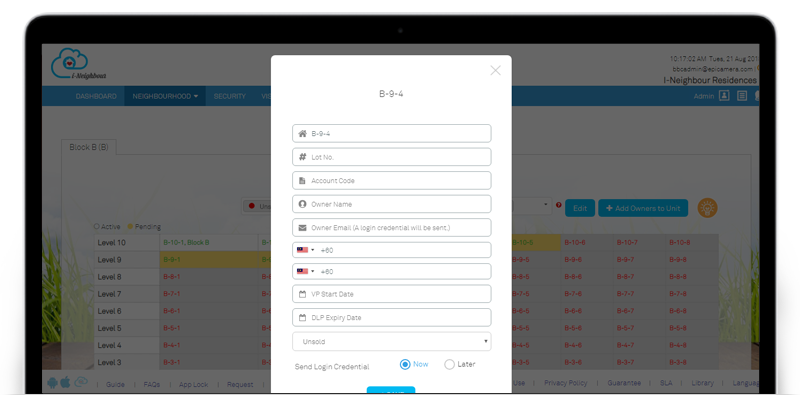
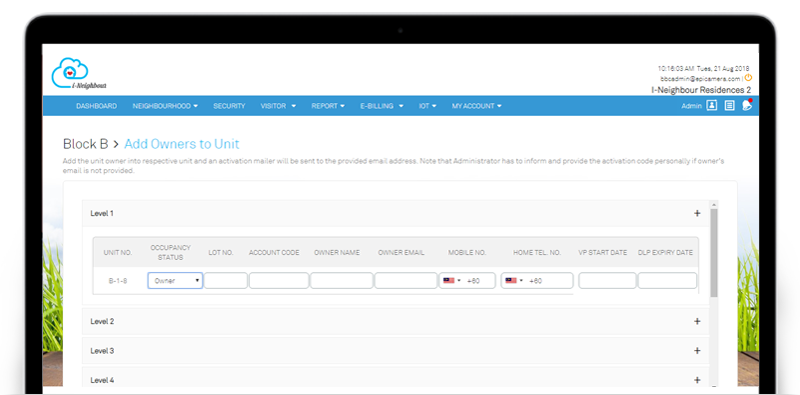
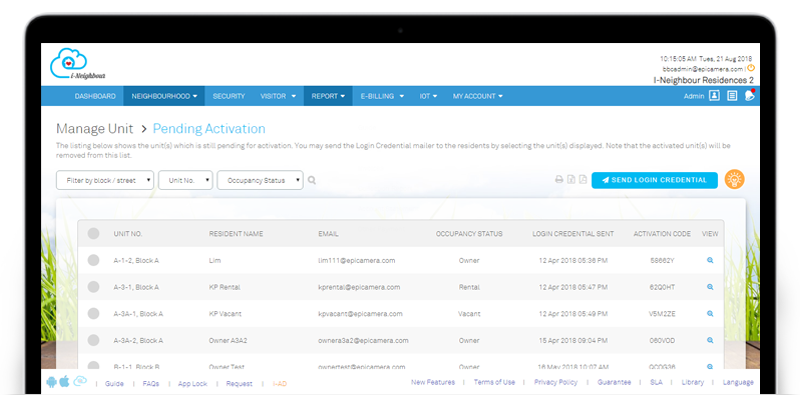
| Manage Unit: Add Unit Owner |
| In Manage Unit module, the Add Unit Owner process flow has been enhanced, which now allows Administrators to add the unit owner without having to insert the email address. This helps in solving the issues regarding Administrators being unable to proceed in adding the unit owner due to a lack of email address from the respective unit owner. Once added into a unit, Administrator is then able to capture the activation code, and forward it to the respective unit owner for account activation purpose. The list of activation code for pending activation units can be obtained in Neighbourhood > Manage Unit > Pending Activation. Sample screenshots are shown as below. |
| 1. Add Unit Owner |
 |
| 2. Add Unit Owner (In Bulk) |
 |
| 3. Pending Activation Units |
 |
| i-Neighbour Mobile App Updates |
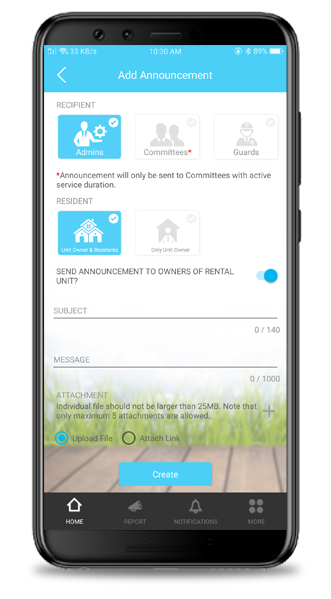
| 1. Announcements
The type of recipients for Residents will be auto-selected by default, which helps hasten the process flow needed in creating a new announcement. |
 |
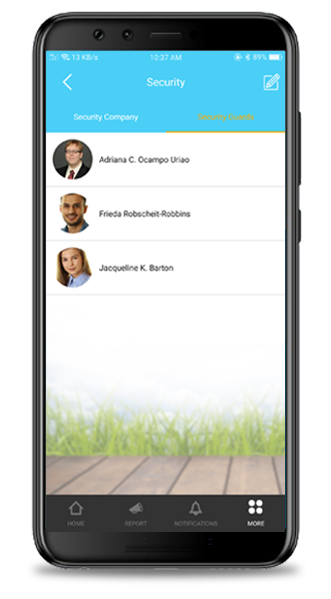
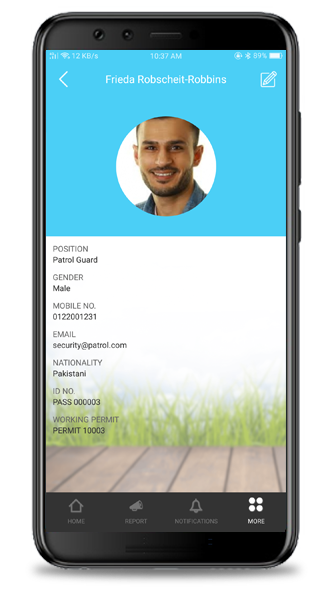
| 2. Security
UI Design in Security module has been updated according to the latest design template. |
  |
| 3. EpiCamera Interlinked with Visitor Check In-Out Actions
As mentioned in the Web Portal, Administrators can now interlink the visitor’s check in-out action with the installed EpiCamera. |
 |
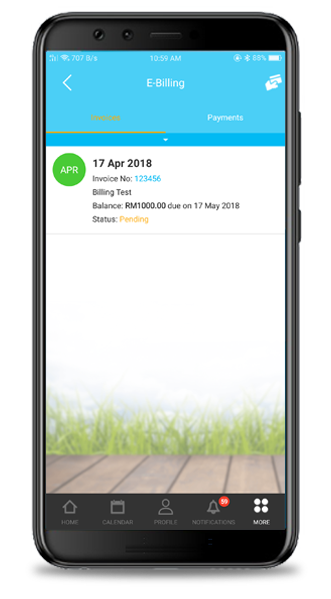
| 4. E-Billing: Invoices
In Invoice listing, an action button “Make Payment” has been added in the invoice details page, which ease the residents in performing the payment without having to quit the listing page. |
  |
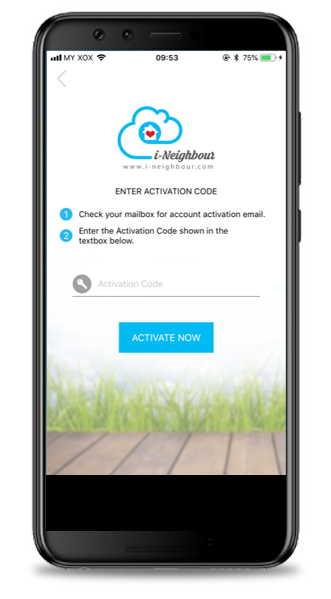
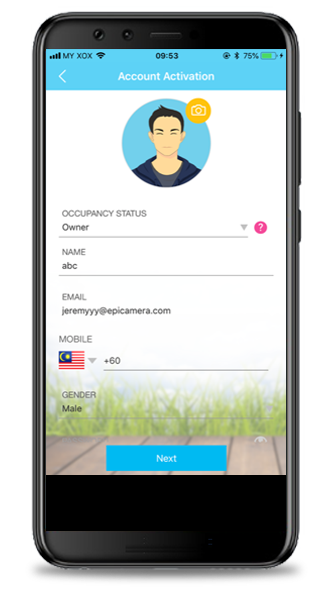
| 5. Account Activation For Unit Owner
The process flow of account activation has been enhanced and simplified, which ease the unit owners in activating their account. The enhancement is divided into 2 parts, which are: |
  |
| Previous Issue: July 2018 • June 2018 • May 2018 |
| Note: If some of the screenshots or steps viewed here are different from the ones in the current system, this is due to our continuous effort to improve our system from time to time. Please notify us at info@i-neighbour.com, we will update it as soon as possible. |